


This is part 2 of the three-parts blog post about my Twitch streaming setup.
- Hardware
- Software (this post)
- Humanware
As I have said before, I have learned a lot from amazing streamers like @noopkat and @csharpfritz so you will find a lot of this content matches theirs.
OBS Streaming Configuration
OBS is the main software that streams to the streaming service (Twitch in my case). I used Streamlabs at the beginning, but because it’s just an abstraction over OBS, I faced some limitations when I wanted to try different plugins. So I preferred to play directly with the OBS itself.
Media is not really my expertise, and I don’t like to stray away from the default configuration OBS has for streaming, so I let OBS do the test and suggest the best configuration. The following is the suggested configuration:
- Output
- Video Bitrate: 2500 Kbps
- Encoder: Software (x264)
- Audio Bitrate: 160
- Video:
- Base (Canvas) Resolution: 1920×1080
- Output (scaled) Resolution: 1280×720 (I am not sure if this is the best configuration, but this is what I am using now 🤷🏻♂️).
- Common FPS Values: 60
- Audio:
- Sample Rate: 44.1 kHz
- Channels: Stereo
OBS Scene Setup
In OBS, the way you construct the scene is by creating layers of Sources, each Source can be an image, web page, video…etc. It needs a little bit of time getting used to, but you can check their website for more detailed guides.
Below is the scenes setup I use, and here it is in an exported JSON format.
The Starting Soon scene
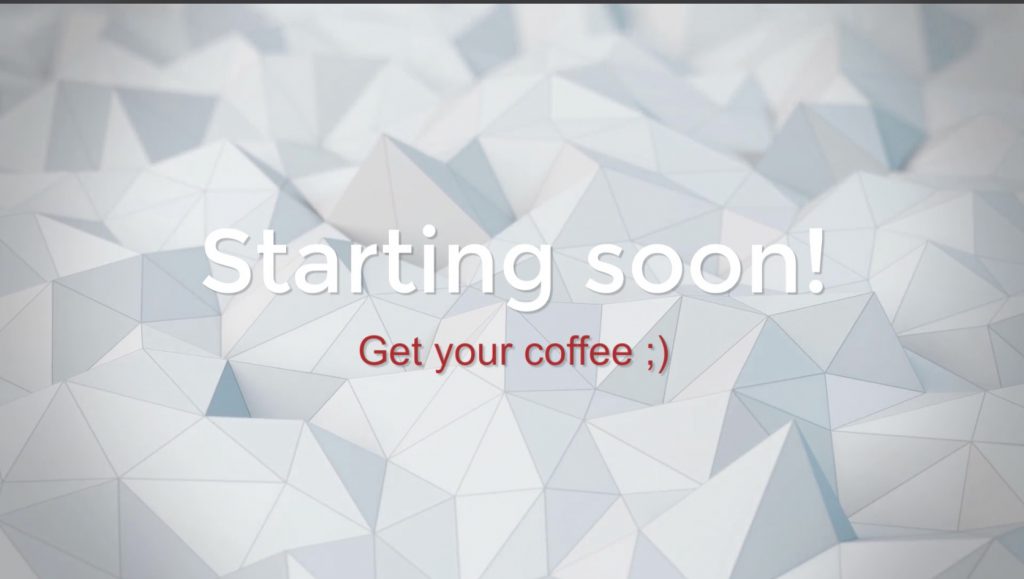
When it’s time for my stream to start, I don’t start the meaty content of the stream instantly. Instead, I display “starting soon” scene to give a chance for the people to join it, this only lasts for a couple of minutes not more.
In this scene, I only show a small video in a loop, without exposing my microphone audio. Some, however, make it really cool like @csharpfrits and @BaldBeardedBuilder displaying their shadows as they move to prepare for the stream.
The Me Talking scene
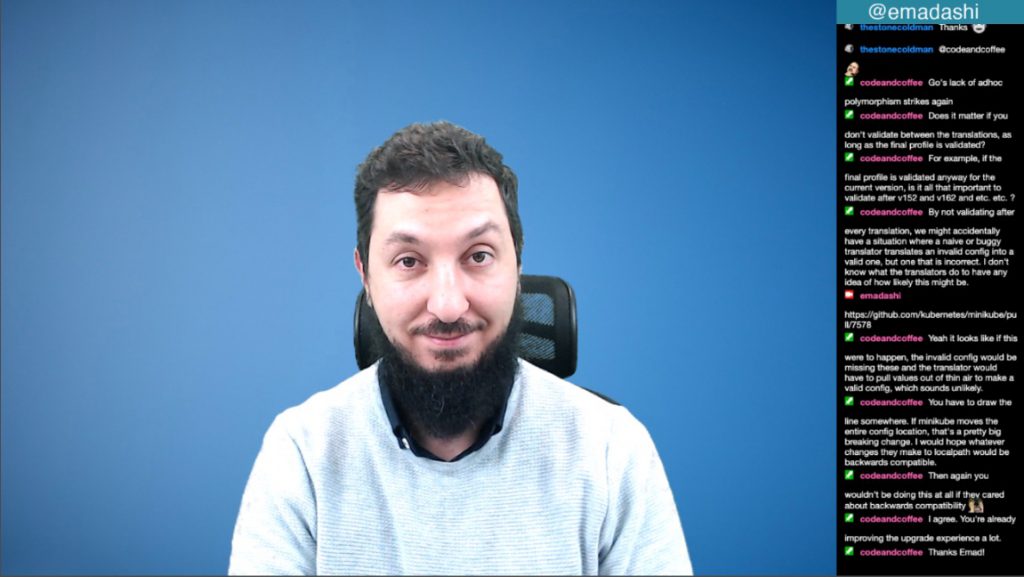
After displaying the Starting Soon scene for about two minutes, I bring the Me Talking scene up. It’s a focus on my face with a display of the chat overlay next to it. In the scene, I also display my twitter handle for people who don’t know me, they can instantly look me up on Twitter (I stole this from @davidwengier :D).
I use this scene to establish a connection with the viewers, without them being distracted by code. It feels more direct and clear. I usually do a recap here, I explain what we went through in the last session, and what is our plan for that day’s session.
In these scenes, I utilise my greens screen. My office is not the best office in the world, and having a green screen means I can put a soothing blue background. I haven’t gone crazy with my backgrounds but will experiment with this in the future.
The biggest trick in this one is to remember to switch to the Code scene; it happened twice when I jumped into the coding part while the scene displayed was still at my big face only, no code, *facepalm*! There are some plugins that allow automatic switch, but I haven’t checked them out.
I also display the chat-box using the Chat-box extension from Streamlabs. I display this on all my scenes (ops! except for the Secret scene below, I just remembered while typing this 😅). The reason why I display the chat is that Twitch doesn’t allow you to keep the videos as an archive, so I offload them to YouTube. Once the video is on YouTube, there will be no capture for the chat unless I record it part of the video.
I know if I stream on YouTube directly, the chat messages will be replayed alongside the recording of the stream, I think this is a beautiful feature. I might consider broadcasting on YouTube in the future, but I’m focusing on one platform for now.
The Coding scene
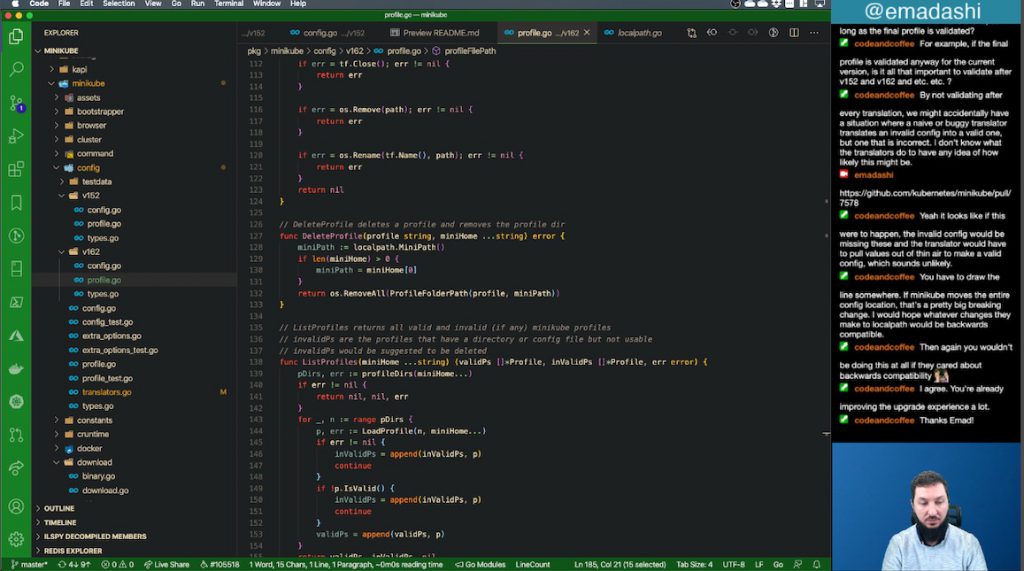
The coding scene is the one I show most of the stream. I have a part (on the left) where I show the code editor/desktop/web pages, a part I where show the chat messages (top right), and a part I show my camera (bottom right).
You will notice that I totally separate the chat and the camera from the code editor, unlike other streamers who show their cameras and chat on top of the code editor. My main reason for this setup is that in rare cases I have to show something at the right corner of the screen, and my camera or the chat will obstruct it otherwise.
The Secret scene
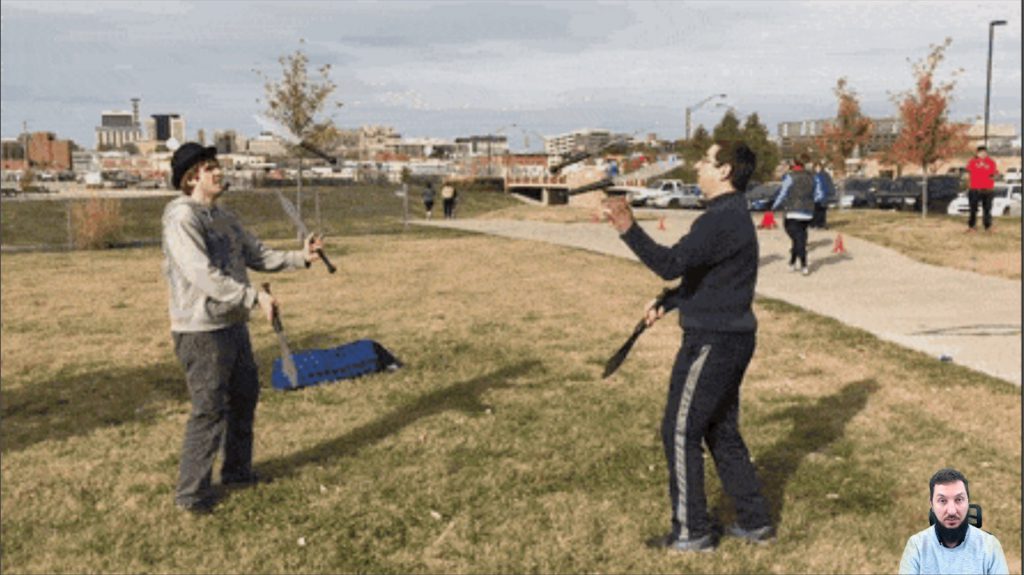
In this scene, I show a funny video in a loop for people juggling knives. I show the video, my camera, and my audio.
Sometimes I need to display secret tokens or passwords on my screen. I have three monitors but I stream one of them only, so I could just simply move my editor to the other screen. However, moving the windows around is a little bit tricky because they don’t fill my window (check the “The Main Monitor” section below for why). Thus, I decided to have this Secret scene, it’s also funny 😀
I have streamed before writing a Visual Studio Code extension that hides YAML nodes that are secrets, but it uses regular expressions, and it was never published. My next stream by god willing will be a new extension that is built better using proper YAML parser (did I just say “build it again but better”?! we developers never change!).
Audio
I use Soundflower to create the right audio setup. It is necessary to convert the audio output of your machine to be another audio source for the stream. Here is a video on YouTube I found useful on how to set it up.
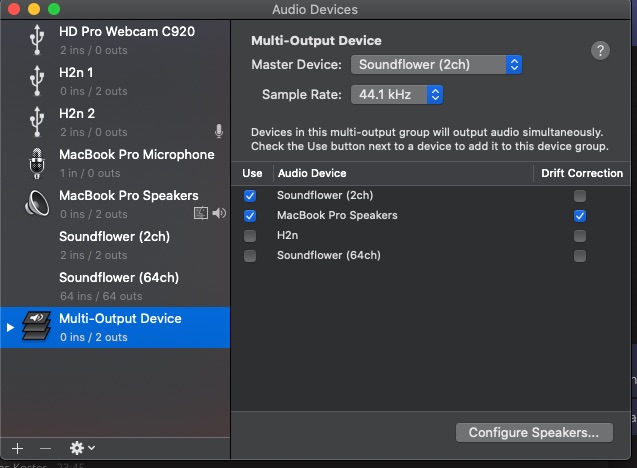
I use my H2N microphone mentioned in part 1 as the main microphone. Music is too distracting to me during coding, so I don’t play music at all.
The Pilot’s View of the Setup
This is how is my view when I am streaming, I have two external monitors and the laptop’s screen:
The Main Monitor
This is where I write the code, and you can see that I have left some room on the right to fit the chat overlay so that it’s captured with the video, this will allow the chat to be a permanent part of the recording so that people who watch the video later on a different medium can relate to my comments on the chat.
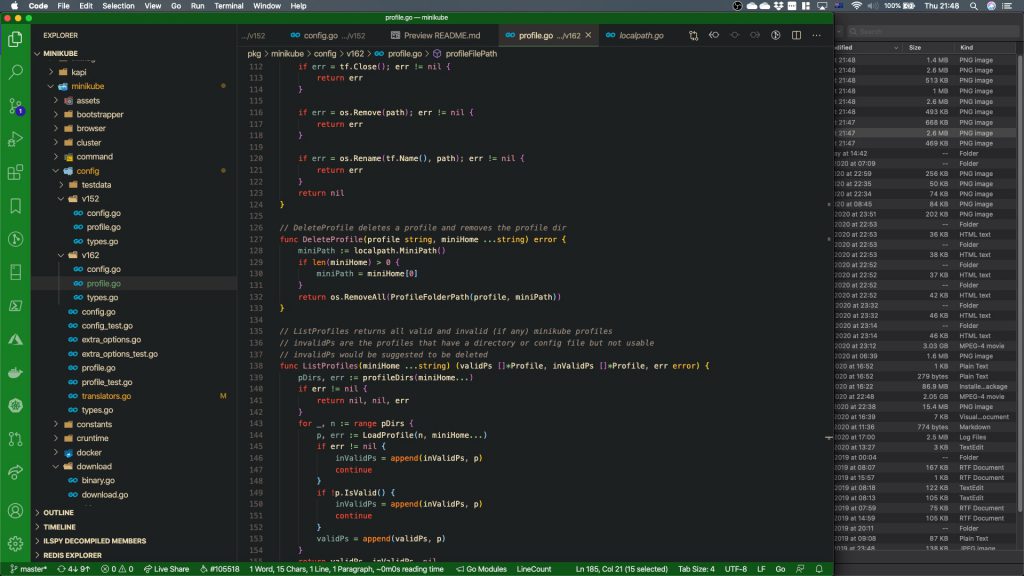
It needed some time to get used to because I am usually a full-screen guy, but after awhile you just don’t see the void.
The OBS monitor
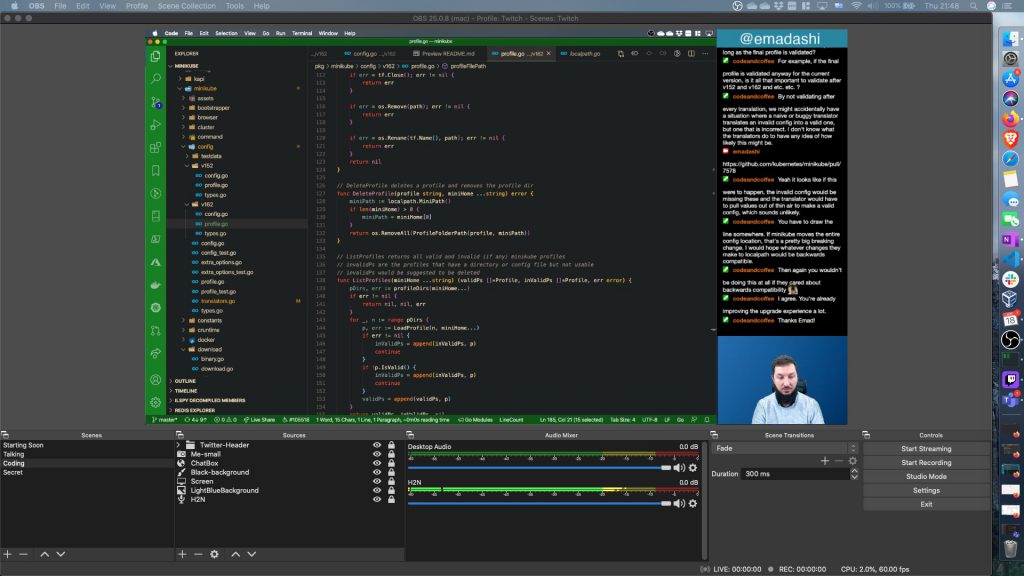
This is where I leave my OBS open, and where I click to switch scenes whenever I need to.
I also use it sometimes to read the chat from the chat overlay. This is not optimal as I often find myself squeezing my eye to read the small font. And because it’s away from the camera, it seems I “look away” from the audience to read what they are saying.
The only good thing about reading the messages from OBS itself is that I am reading from the same view source the audience read from. This way, if for some reason the overlay is not working I wouldn’t be reading something the audience is not seeing.
In my future streams, I will grab the link of the chat overlay and put it in a browser, and then squeeze that browser window next to my VSCode. This way I won’t look away from the audience to read their messages. (I tried this before when I was proof-reading this post, didn’t work because the chat overlay had a minimum width :(. Will update you when I find a better solution).
The laptop monitor
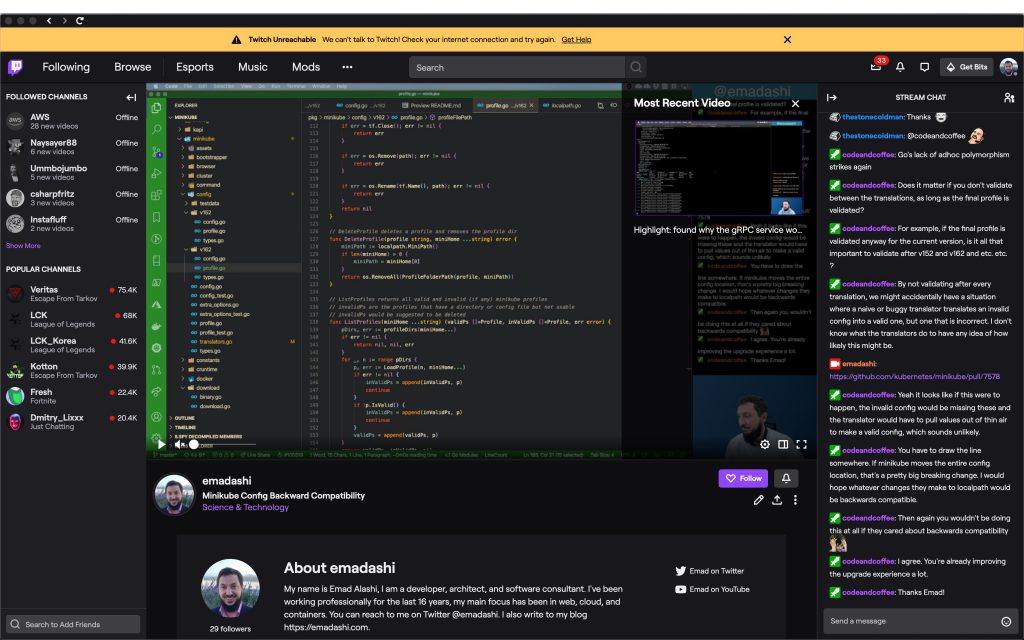
I use this screen as an auxiliary monitor if required, recently I start opening the native Twitch app to see how things are going on the other streaming end. (I have no idea why at that time Twitch App was complaining about the internet :D).
AppleScript:
I have been a Windows user for so man years of my life, I wish there is an equivalent for AppleScript in Windows (Maybe there is, let me know if there is). It automates many aspects of the MacOS: opening applications, resizing windows, changing settings, and a lot more.
I got this tip from @noopkat (like many other tips). Just before I start my streaming session I run my script and it opens OBS, opens a clean browser window, resizes my VSCode and place it in the right position…everything! You can have a look at it here
Visual Studio Code
After .NET Core, and MacBook becoming my main PC, my main IDE has become Visual Studio Code. I love its reliability, lightness, and extensibility.
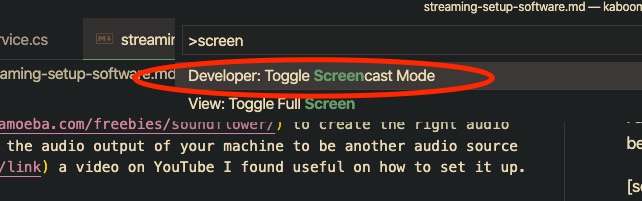
There is a feature in VSCode called “ScreenCast Mode” (thanks @ShahidDev for the tip), it prints the keys pressed down on the keyboard. This is a very good way to share with the audience the love of shortcuts.
There are tools that work on the OS level, but I haven’t used it yet. I have my eye on Keycaster, haven’t tried it yet though.
Zsh as terminal
I can’t really speak a lot about this one, it’s a feature-rich terminal that is also extensible, however, I haven’t really utilised a lot of its features. I hope @tkoster is not disappointed as he is my guide in anything related to Unix and Linux!
Twitch channel setup
Truly, Twitch does NOT have the best UX for their platform, it’s confusing to say the least. However, they are constantly changing things around and try their best to improve.
The customisable page in your channel (at least at the time of writing these words) is the About page, you can add panels and custom content. Below are the panels I have.
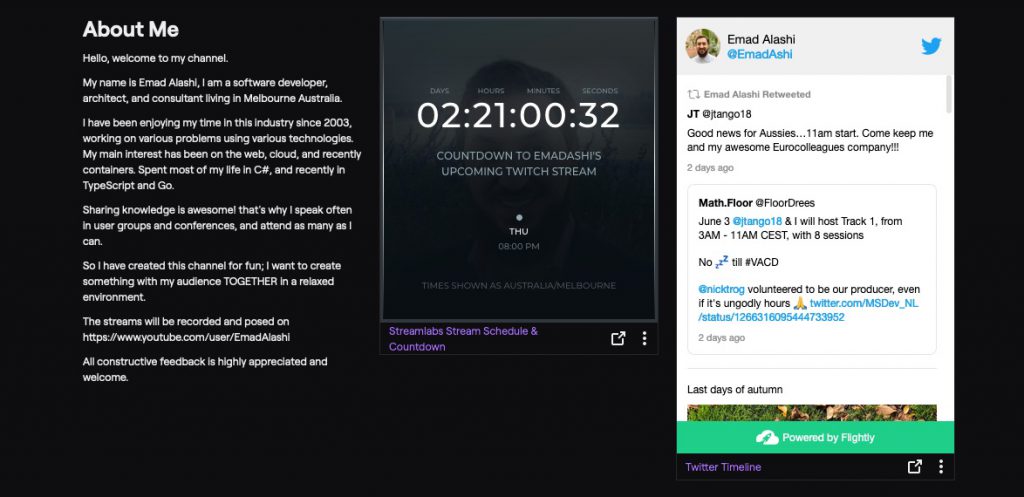
About Me panel
This where the bio goes, I like to use the first singular on Twitch because it’s a direct conversation with the audience, it makes sense to say “hi, welcome to my channel” than “Emad is a developer…”.
After I had this panel for a while, Twitch decided to display the About Me info you are in your profile in the About page, this somehow made this panel is redundant. However, the About Me in the profile is limited to 300 characters, this one you can write more, hence I renamed mine to “More About Me”!
Stream Schedule panel
This is an extension from Streamlabs to show the visitors when your next stream is. Twitch has introduced their own Schedule page in the channel, so this one might be redundant.
I am not sure if this is really benefiting the audience though, at some point I was thinking of creating my own Google calendar for the streaming and let people subscribe to it so they know when I cancel one. I might still do it so stay tuned, and let me know if you would like that too.
Twitter feed panel
There is nothing like Twitter to tell people who you really are (not really, it’s only 140 characters of text!). This extenstion provides a list of your most recent tweets.
Chat Bot
Up until writing this post, I didn’t have a chat bot. But in the last stream one of the audience sent “!theme”, and I didn’t have a bot to answer, so I stopped whatever I was doing and started showing my theme. If I had a chat bot setup this wouldn’t have happened.
The next step for after posting this is to set up a new Bot. There are so many bots out there, this video shows several of them. I am already leaning towards nightbot, but I also know that @chahrpfritz has been working on one, so let’s see how it goes, probably will be another post so stay tuned or ping me if I don’t write about it ;).
Summary
As you can see, this is a space of a continuous change; you will find yourself keep changing setups, and tweaking settings here and there until you find the final setup, which soon will change after :D.
I hope this was beneficial, let me know if you need more information.
Pingback: My Twitch Streaming Setup - Part 1 Hardware - Emad Alashi